
This is one of the most requested topics that I get and today it’s here, how to create a custom Divi header.
In this tutorial you will be learning how you can insert a section layout above Divi’s main header. In this section you can place any Divi module which gives you endless design options.
I have created a demo custom header and this is the header we will be creating in this tutorial, however when you master these skills you can pretty much create any kind of header.
Update: this tutorial is updated for Divi 4.0+ which include the Theme Builder. If you are still using an older version of Divi you can still create a custom header, scroll down to the section Create a custom Divi header before 4.0VIEW DEMO
Create a custom Divi header with the theme builder
Step 1: Download and import the header layout
You can download the files here.
After downloading unpack the folder, inside you will find the json file that you can import in the Divi library.
Go to Divi > Divi Library and click on the import/export function.
Then go to the import tab and upload the json file Custom Divi Header.json
Step 2: Create a global Divi header
Go to Divi > Theme Builder and click on “Add Global Header”
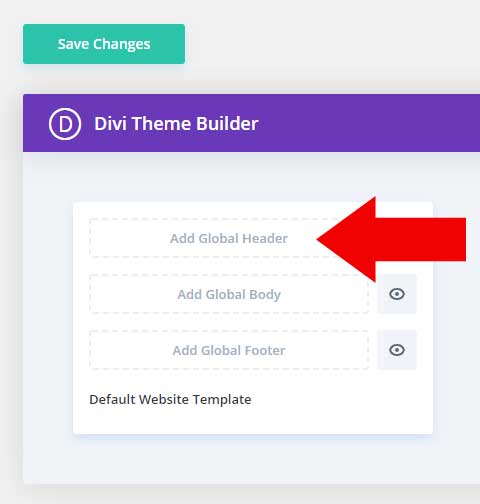
Choose “Build Global Header”
Click on the plus icon off the section (blue) and go to the tab “add From Library”
Then click on the Custom Header.
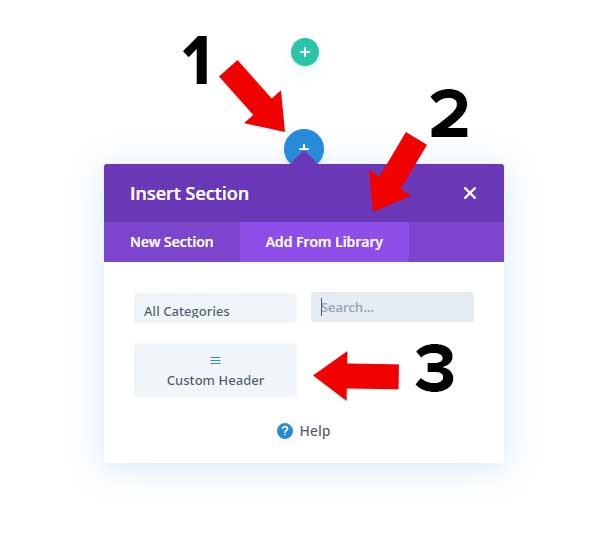
Click on save (right bottom). To leave this screen click on the cross (top left).
Important: Click on Save Changes.
Step 3 Customize the header and menu
You have now created a custom header with menu. This means that the Header & Navigation options in Divi > Theme Customizer are gone.
You can make all of your customizations now in Divi > Theme Builder > Global Header.
In the demo I used a little bit of CSS to give the menu items more space. If you want that as well you can place this snippet in Divi > Theme Options > CSS
.et_pb_menu .et-menu>li {
    padding-left: 25px;
    padding-right: 25px;
}
Congratulations you have created a custom Divi header. If you have any questions leave a reply in the comments below.
Create a custom Divi header before 4.0
If you are using an older version of Divi before 4.0 than you can follow this part of the tutorial to build a custom header.
Important: If you do this on an existing website make sure to create a backup before proceeding.VIEW DEMO
Step 1: Create the custom header section
Go to Divi > Divi Library
Click on “Add New” you now will get this popup
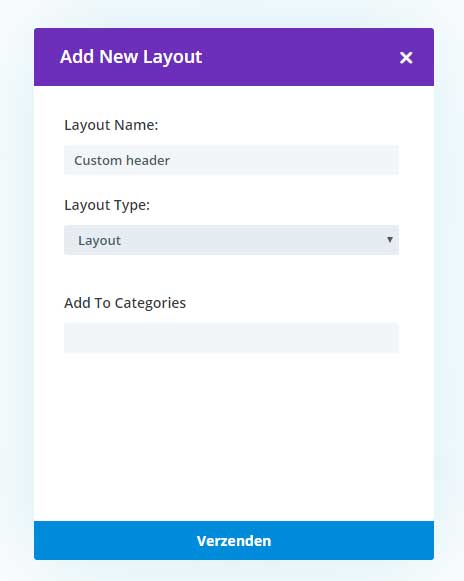
In the layout name field, you can give your custom header any name you want.
Set the Layout Type to: Layout
If you get the options how you want to start then choose “Build from scratch”
When you are back to the builder you need to take a look at the URL in your browser.
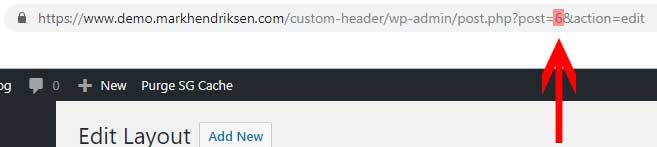
Write down the number after post=
In my case this is the number 6 but it will be a different number for you, this can also be a 2,3,4 or more digits number.
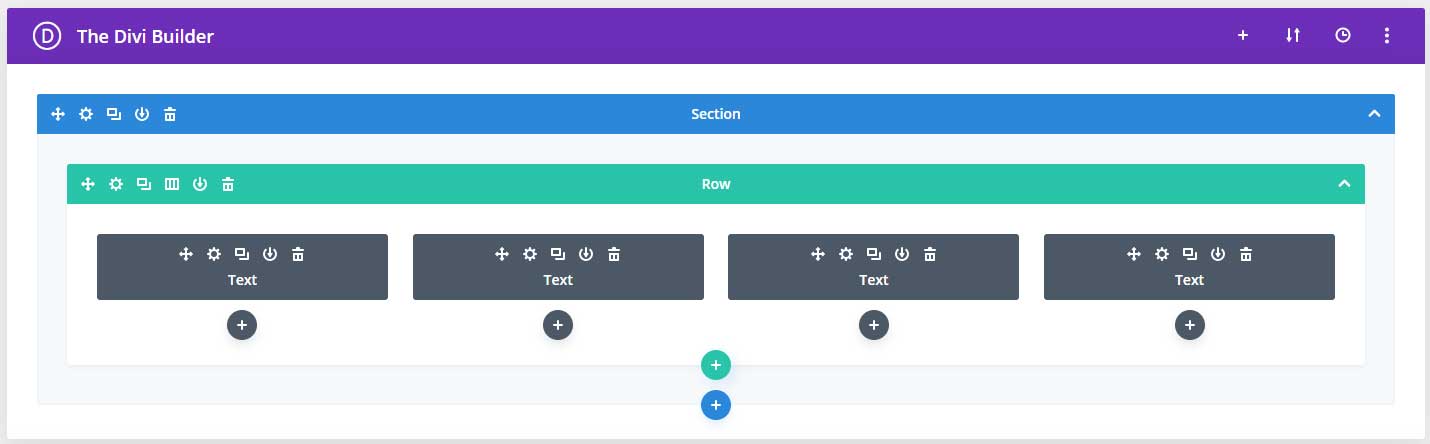
You can populate this section quickly just as an example, we will make it better in a later step.
For now, I have created a 4-column structure within each column a text module with the word test in it.
We are going to give this sect
Recent Comments